

Unlock the true potential of your Android device by installing TWRP recovery. This comprehensive guide provides a step-by-step approach to installing Team Win Recovery Project (TWRP), a powerful custom recovery that opens a world of customization options for your Android phone or tablet. TWRP allows you to perform advanced operations such as flashing custom ROMs, creating and restoring backups, and gaining root access, ultimately giving you complete control over your device’s software.
Whether you’re looking to install a custom ROM, gain root access, or simply create a backup of your current system, TWRP recovery is an essential tool for any Android enthusiast. This guide will walk you through the installation process, covering everything from unlocking your bootloader to flashing TWRP using fastboot. Learn how to unleash the full power of your Android device and take control of your mobile experience with this comprehensive TWRP installation guide.
Understanding TWRP Recovery and Its Benefits
TWRP (Team Win Recovery Project) is a custom recovery environment for Android devices. It replaces the stock recovery software that comes pre-installed on your phone. TWRP provides a touchscreen interface that allows you to perform advanced operations, extending far beyond the limited functionality of the stock recovery.
Unlike the stock recovery, TWRP offers a much wider range of functionalities. These advanced features give you granular control over your device’s software.
Some key benefits of using TWRP include:
- Installing Custom ROMs: Flashing new operating systems onto your device to enhance performance or access new features.
- Creating and Restoring Backups (NANDroid Backups): Making complete backups of your system, allowing you to revert to a previous state if something goes wrong.
- Installing Custom Kernels and Mods: Fine-tuning your device’s performance and adding custom features.
- Rooting Your Device: Gaining administrative access to your Android system for more control.
- Wiping Data and Cache: Performing selective data wipes for troubleshooting or a fresh start.
By using TWRP, you gain significantly more control over your Android device, enabling customization and modifications beyond the manufacturer’s restrictions.
Prerequisites for Installing TWRP
Before embarking on the TWRP installation journey, ensure you’ve met the following prerequisites. These steps are crucial for a successful installation and will help avoid potential issues.
Device Compatibility and Downloads:
Confirm Device Compatibility: Verify that TWRP officially supports your specific Android device model. Installing an incompatible version can lead to a bricked device.
Download TWRP Image: Download the correct TWRP image file (.img extension) corresponding to your device’s model and variant from the official TWRP website.
Download ADB and Fastboot: Install the Android Debug Bridge (ADB) and Fastboot tools on your computer. These are essential for communicating with your Android device.
Device Preparation:
Back Up Your Data: Strongly recommended. Installing TWRP and custom ROMs can potentially wipe your data. Back up all important files, photos, and apps.
Charge Your Device: Ensure your device has a sufficient charge (at least 60%) to prevent interruptions during the installation process.
Enable USB Debugging: Activate USB debugging in your device’s Developer Options. This allows your computer to interact with your device in ADB mode.
Unlock the Bootloader (If Necessary): Many devices require an unlocked bootloader to install TWRP. Consult your device manufacturer’s instructions for unlocking your bootloader.
Step-by-Step TWRP Installation Guide for Various Android Devices
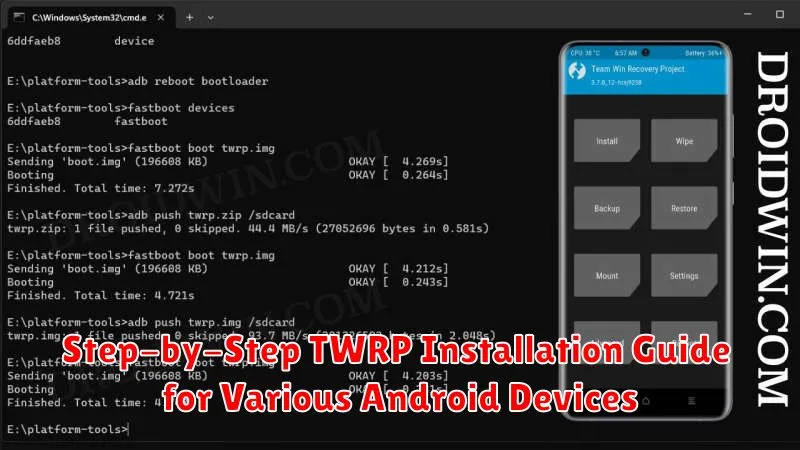
The installation process for TWRP varies depending on your device’s manufacturer and model. It’s crucial to follow the specific instructions for your device. Generic steps are outlined below, but always consult a reliable guide tailored to your specific Android phone or tablet.
General Installation Steps:
- Unlock the Bootloader: This is usually the first step and involves enabling the ability to modify the system partition. Consult your device manufacturer’s instructions, as this process differs widely.
- Download the Correct TWRP Image: Head to the official TWRP website or a trusted forum like XDA Developers to download the correct image file for your specific device model. Downloading the wrong file can brick your device.
- Install ADB and Fastboot: These tools are essential for communicating with your Android device from your computer.
- Connect Your Device to Your Computer: Ensure USB debugging is enabled on your Android device.
- Boot into Fastboot Mode: Usually achieved by holding a combination of power and volume buttons while the device is powered off. Refer to your device’s instructions.
- Flash the TWRP Image: Use the fastboot command to flash the TWRP image to your recovery partition. This usually involves a command like
fastboot flash recovery twrp.img(replacetwrp.imgwith the actual filename). - Reboot into Recovery: After successful flashing, immediately boot into recovery mode to prevent your stock recovery from overwriting TWRP. This is also done via a button combination specific to your device.
Note: These are generalized steps. Always refer to device-specific guides for the most accurate and up-to-date instructions.
Troubleshooting Common TWRP Installation Issues
Encountering problems during the TWRP installation process is not uncommon. This section addresses some frequent issues and their solutions.
Device Not Recognized by Computer
If your computer doesn’t recognize your Android device, ensure you have the correct USB drivers installed. Try a different USB cable and port. Verify that USB debugging is enabled in your device’s developer options.
Stuck at Bootloop After TWRP Installation
A bootloop (device continuously restarts) can occur if the installation process is interrupted or the incorrect TWRP version is flashed. Ensure you downloaded the correct TWRP image for your specific device model. Try reinstalling TWRP, carefully following the installation guide.
Error 7
Error 7 usually indicates an incompatibility between the TWRP version and your device. Double-check that you are using the correct TWRP image designated for your device model. Consult the official TWRP website or your device’s specific forum for further guidance.
“Fastboot Not Recognized” Error
This error suggests an issue with your fastboot setup. Verify that you have correctly installed the ADB and Fastboot drivers on your computer. Check if fastboot is added to your system’s path environment variable. If the problem persists, try reinstalling the ADB and Fastboot tools.
Tips for a Smooth TWRP Installation Process
While the specific steps for installing TWRP may vary, these general tips can help ensure a smoother process:
Backup Your Data
Back up your important data before starting the installation process. Installing TWRP and custom ROMs can sometimes lead to data loss, so it’s crucial to have a backup.
Battery Life
Ensure your device has a sufficient battery charge, preferably above 60%, to avoid interruptions during the installation.
Follow Device-Specific Instructions
Carefully follow the instructions specifically designed for your device model. Variations in hardware and software can require slightly different steps.
Verify Downloads
Double-check the downloaded files to ensure they are the correct versions for your device and haven’t been corrupted during download.
Patience is Key
The installation process may take some time. Be patient and avoid interrupting the process unless specifically instructed.
Exploring Advanced TWRP Features and Usage
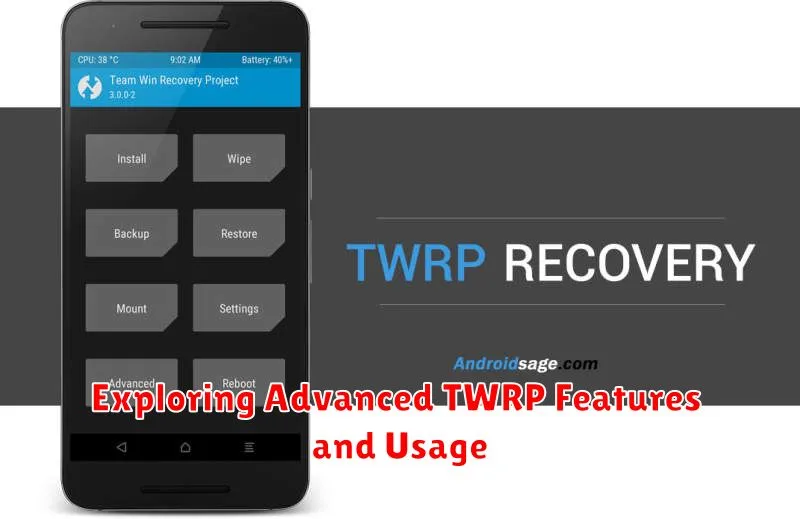
Beyond basic backup and restore functionality, TWRP offers a range of advanced features for experienced users. These features provide greater control over your Android device.
File Management: TWRP allows direct access to your device’s file system. This enables you to copy, move, and delete files, offering advanced troubleshooting and customization options.
Flashing: TWRP supports flashing various file types, including custom ROMs, kernels, and mods. Understanding the zip file structure and the risks involved is crucial before proceeding with flashing any files.
Partitions: TWRP provides detailed information about your device’s partitions. You can backup and restore individual partitions, providing granular control over your system.
Terminal Emulator: A built-in terminal emulator allows execution of advanced commands, further extending TWRP’s capabilities.
Backing Up and Restoring Your Android System with TWRP
TWRP’s primary function is safeguarding your data through comprehensive backups and facilitating seamless restorations. Backups created in TWRP are extremely helpful, particularly before installing custom ROMs or making significant system modifications. They offer a safety net should anything go wrong during the process.
Creating a backup in TWRP is a straightforward process. Boot into TWRP recovery and select the “Backup” option. Choose the partitions you wish to back up – typically including System, Data, and Boot – and swipe to confirm. Storing your backups on an external SD card or USB drive is highly recommended for easy access and enhanced security.
Restoring a backup is equally simple. In TWRP, select “Restore” and choose the desired backup file from your storage location. Swipe to initiate the restoration process. After restoring, it’s crucial to reboot your device for the changes to take effect.